Friday, July 18, 2014

Grafted Trees

I know it is a bit late in the year since I actually wrote this post.  Things got quite busy on the farm and then Alicia and I had a baby boy earlier this month so that is keeping us both quite busy but here is the post that I started months ago:

To me one of the more beautiful sights in spring is seeing all the trees in bloom.  The past couple of years I have been doing some grafting on fruit trees at Casa Maria in Milwaukee, at the farm in Watertown and even at my parents house.

Grafting describes any of a number of techniques in which a section of a stem with leaf buds is inserted into the stock of a tree (UMN Extension Grafting Site).  So the reasons for doing this are many.  For example you have a favourite kind of apple tree and you want to duplicate it.  The problem is that planting the seed from your favourite apple tree will not give you the same kind of fruit.  That is to say planting the seed from a Jonagold will not give you a Johnagold tree.  So instead you take a bud or a twig/stem from the Johnagold tree and splice it into another apple tree.  This way the genetic material from the Johnagold will then be in the grafted tree.  We have lots of grafted trees at the farm.  Some are grafted so that the they don't grow to be full sized, others are grafted so that we can multiple varieties from one tree.  In Milwaukee I grafted a pear tree with several other types of pears.  Multiple varieties are needed nearby in order for the tree to pollinate and set fruit.  This way I only needed to have one pear tree.  The grafts that I did a few years ago now are quite large and look well established.

At the farm I grafted a variety of different apples onto the crabapple tree.  The white flower is from a standard apple and the grafted branches should bear fruit in just a couple of years instead of a long time that it would take for the tree to grow from seed and then be grafted.  An additional plus is that the crab apple is very hardy and well established. 
The white flower is the grafted apple onto the crab apple.

I also tried something new this year.  I did some green grafting with grapes.  Green grafting as I am calling it is when the scionwood is not dormant.  I need some more practice with it in order to get the right amount of a bud to get it to work but this is my first successful cultivated to wild grape graft.  I am eager to see what happens next year.

This is the result of my green grafting concord grapes onto a wild grape vine.  It actually took and is producing new leaves.

A piece of the concord grape cut and ready to be spliced/grafted onto a wild grape vine.  This method of budding didn't work as well for me when I tried green grafting.

A piece of concord grape vine cut for tongue graft which surprisingly worked.


The crab apple tree that has been grafted onto a few times.

The standard pink crab apple flowers.


Sunday, March 23, 2014

The Making of Maple Syrup

I recently got to present at Sustain Jefferson's Makerspace Discovery Meeting.  I exhibited the maple syrup rocket stove that I worked on building with Greg David and the top bar beehive that I am working on making.  I actually was featured in a picture on the Watertown Daily Times front cover.  The makerspace will be a place for people to get together in the community to work on projects such as wood working, metal working, knitting, crafting, sewing, incubate business and much more.
The presentation I gave highlighted the improvements to the maple sugaring operation over the past 6 years.  I wanted to share some of what I have done over the past years here.


 The original way of tapping and collecting the sap.  We now use a 5 gallon bucket that sits on the ground and is connected to the spile with a piece of flexible hose.


The first year I made a crude fire box with concrete blocks and a wire grill rack to support flimsy aluminum pans.  It worked okay but wasn't very efficient.


Still using the same system - different view.
The small firebox between the concrete blocks.

A slightly more elegant system with mix-matched diameter chimney pipes.

An improved system.  Still with mix-matched chimney pipe but now the flimsy aluminum trays are sitting on top of a turkey smoker (large metal box) with sides on it to block the wind.


Automatic sap injector.  A food grade rain barrel and hose that would allow a direct flow of sap into the pans.

The automatic sap injector line running downhill to the operation.  Note the use of a 2X4 to hold the chimney up.

The automatic sap injector feeds into copper coil around the chimney to pre-heat the sap.  This year the pan became stainless steel catering pan and is cut into the turkey smoker.  The first boil of that year had the pan sitting on top but Alicia and Carlo noticed that it wasn't transferring heat that well and began to punch holes through the fire box.


The new shiny door!

Trying to increase surface area and chimney length to get a more efficient boil.  The pan rested on the wire rack but unfortunately didn't get very hot.

The front view of the evaporator.

There always is a lot of this - sitting a waiting.


Last year at the farm we boiled the sap on a propane cook stove.  Gladly this year with the high propane prices we are not.


I tried to make a small rocket stove out of bricks but unfortunately the chimney wasn't very tall and it didn't draft well.  We ended up with ash in the syrup which wasn't so yummy.

The rocket stove in action and slowly boiling away the sap.
This is the firebox of the rocket stove.  It burns efficiently but will need some improvements before it can really keep up with the evaporation ability of the other new evaporator.
The big evaporator built this year.  It holds around 7 gallons of sap at a time and we were able to get a 3 gallon/hour evaporation rate this year.  I think we can easily increase that if we get it a little bit more level, have more draft control, and tend it more frequently for the next boil down.

The three trays steaming and boiling away.
The firebox is lined with bricks which help to hold the heat in and a baffle at the back forces the flames to touch the pans.  It is still warm the next morning and was still smoking some 12 hours after we finished.
I'd love to hear any thoughts on ways to improve it or if you have any questions on making syrup yourself.

Neal

Friday, March 21, 2014

2014 Garden Plans

We are keeping things simple this year with the little one due to arrive in July. We ordered all our seeds from the Sand Hill Preservation Center. They are a smaller company that offers heirloom seeds, and we've had good experience working with them in the past. We limited our choices of seeds that need to be started in flats this year because we will be traveling quite a bit this spring. Also, last year we started seeds to early and had frost issues in our potting shed. Many of our choices this year can be planted straight in the ground and not have to be fussed with very much over the summer (pruning, staking, etc).

Here's what we've got:
Collards (Morris Heading)
Spinach (America)
Onion (Red Burgundy)
Perennial Onion (Egyptian Winter)
Beets (Colossal Red Mangel- the little ones are supposed to be good for eating and supposedly the chickens will like the larger ones. We shall see)
Popcorn (Fireside)
Luffa (Angled- for washing with... not eating)
Winter Squash (Sibley)
Winter Squash (Red Kuri- complementary)
Tomato (Abraham Lincoln- complementary)
Sage (Broadleaf)
Dill (Mammoth)
Lovage (this is an herb that tastes like celery)

Theoretically we should have planted the onions by now and should just be starting the collards and spinach. Realistically, we are going to Maine for an extended weekend trip to visit our sisters so this will get started a bit late. Oh well... it's been a slow start to spring anyway.

Saturday, March 8, 2014

Eat down the pantry 2014

Last year we started our eat down the pantry challenge in May. It was definitely helpful but I remember thinking that it would be better to start it earlier in the season next time because we wanted to use up the freezer veggies before the fresh veggies were available. So this year we are starting our challenge in March and going into April. Like last year, we will be buying dairy as we need it and may buy fresh veggies if we use up all of our frozen and dried veggies.

I did an inventory of our pantry items with the exception of the grains and beans. I also inventoried the kitchen freezer. There are more meats and probably more frozen fruits and veggies in the deep freezers. We are going to have our hands full just trying to get through the food that is already in the house though so I didn't bother inventorying the deep-freeze. 


I think the most difficult things to use up it will be the jams, pickles and chutneys. If anyone has recipe ideas for using these please let us know. We got on a kick because we had so much produce this summer but we didn't consider how much of it we could actually use in the winter. Oops.


Seems like the freezer items will be pretty easy to use. We will post recipes and pictures as we go along if we find anything particularly interesting. Now it's time for me to start menu planning.


Tuesday, March 4, 2014

Maple Syrup Evaporator

Its been a very long time since I have guest posted on here.  Alicia has been very busy working on trying to start her own postpartum doula business as well as helping to plan the Midwest Women's Herbal Conference.  We have also been cross country skiing a lot and this winter has been the best in my memory for it.  The snow is still here on the ground but we are beginning to think about Maple Syrupping season.  I recently got an old oil tank previously used for heating oil but it had a small hole and so our friend Dale had it sitting at his farm waiting for a great use for it.  He helped me look-up some great ideas on YouTube and this is a modification of one of the ideas.


Here I am decked out in my PPE (Personal Protective Equipment) after I cut the top off for the placement of the pans.

Oil drum tank with the top cut off.  The fastest way to cut it was with the angle grinder which is sitting to the right of the tank.
The inside is lined with bricks to insulate it and raise up the location of the fire.  I am cutting a door opening in the front.  In the picture you can kind of see the orange glow of the sparks flying from me cutting the metal.  That is my favourite part of using the angle grinder.  Thanks to Mike Kelly from High Meadow Farm who came over and helped me load it up with bricks, level it and figure out the logistics of where the door should be.
The tank is in its final home next to the corn crib and somewhat sheltered from the wind.  


This is just the first stages of making our big evaporator.  I will also be trying out making a smaller one using a rocket stove from Greg David.  Check back soon to see the progress. - Neal

Monday, January 27, 2014

Hodgepodge

Wow... we haven't posted a new blog in a long time. Here's a hodgepodge of pictures from things we've made over the last couple months. 


Turkey we bought from a friend's mom. We still have some in the freezer. 


Neal made an apple pie for Thanksgiving with his side of the family.


Walnut-apalooza fun times


Tediousness getting the black walnuts out of their shells


We found that it helped a ton to soak the whole walnut (minus the green husk) in water overnight. Much easier to get the meat out that way.


This is me right before my sugar coma. Lots of cookie making happening here with Neal and Mercedes.


Neal has taken up woodcarving this year. I'm looking forward to a little personal spoon and also a soup ladle! 


We made hotpockets with a recipe from "The Homemade Pantry" by Alana Chernila. These ones are overcooked, but we will definitely be making them again.


Bean quesedillas with homemade corn tortillas.


I made cards with Melissa, my friend from highschool. It reminded me of old times scrapbooking together :) Plus she made me a scarf that I've been wearing quite often.


Friday, November 22, 2013

Cheeeeeeeeseheads

I recently took a soft cheese making class with Herbalist, Linda Conroy. I got some milk from Grassway organics and tried out my hand at feta cheese. Here is the process after the heating, rennet, and culture steps.

"Cutting the cheese"

Draining the whey

"Cutting the cheese"...again

Draining the whey...again...after salting heavily

The final cut

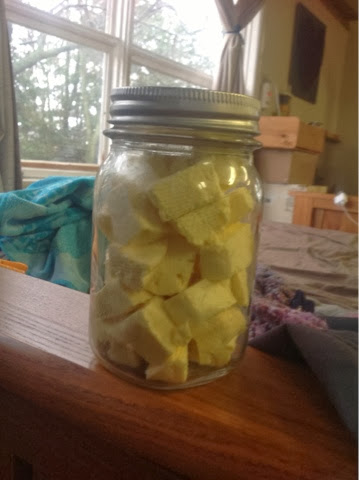
We stored some in the fridge like this.

The rest is stored in olive oil in the cupboard. This is my preferred method, but we ran out of olive oil.

And, finally, Neal reading for our book discussion. He set the thermostat himself, so no comments about me being a meanie by keeping it cold in there.